All You Need To Know About “Post Revisions” In WordPress

by admin
As we all know WordPress is a recognized online, open source website building tool.
Written in PHP!
It is possibly the most stress-free, easiest and most powerful blogging website.
for adding revisions was the ability to revert to an older
WordPress comes with many built-in functions, but here we are focusing on UNDO changes with the help of “POST REVISIONS”.
Don’t you hate it when you’re writing an article and you delete something and come back later and wish you hadn’t deleted it?
Well exactly that is the time when “POST REVISIONS” comes in!
WordPress has inbuilt “POST REVISIONS” feature that saves the previous version(s) of your writing. Doesn’t it sound interesting?!
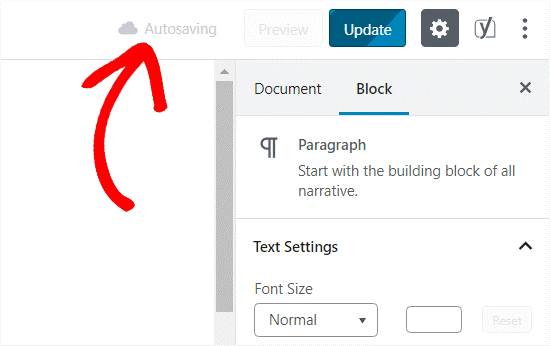
The REVISIONS are associated with another feature called AutoSaves. Every time you write something, WordPress saves a temporary file of a revision automatically into the storage system.
By default, WordPress saves a copy of your content in every 60 seconds while editing/writing. This helps to protect you from losing your content in the event of a browser crash or lost internet connection.
Whenever you hit the “Save”, “Update” or “Publish” button, all your drafts, including the latest get saved in your revision’s WordPress database. You can locate, browse or revert to these from a Post Edit screen.
In this blog, we highlighted some very important topics that help you to understand about “REVISIONS”.
#1. Why Revisions Were Added To WordPress?
#2. Why Should You Use Post Revisions?
#3. Use of Post Revision to UNDO Changes in WordPress
#4. Comparison between Different Revisions
#5. Customizing WordPress Revisions
#6. Deleting Post Revisions on WordPress
#7. Limiting Post Revisions on WordPress
#8. How to Disable Revisions in WordPress
Why “Revisions” were added to WordPress?
Autosave feature was added to prevent the risk of losing data. Everyone knows that computers are weird and unpredictable. You will never know when your browser will crash or computer will restart automatically. There are also situations when you unintentionally close the browser window or refresh the page.
Another important reason for adding revisions was the ability to revert to an older version of a post. Revision’s improved the editorial workflow. There are many times in writing when you make mistakes or throw out the whole idea. After a day or two, you want to return to that initial thought. Well, the REVISIONS allow you to compare the past versions of your publications.
Why should you use “Post Revisions”?
The POST REVISIONS help you to edit the post without any fear of losing content. You can see the development of your post from a completely different perspective. You can switch between different edits until your post or blog is perfect for publishing.
It can also be a great tool to review your writing style. WordPress Revisions make it easy to do side-by-side comparisons as it assures you about the changes that you made to the content.
When Multiple authors are editing the same post, this task is a bonus for WordPress users because each of them can individually edit drafts. Since their names have been notified each of them would be able to see the changes made in the post.
In WordPress the process of UNDO occurs with Post Revisions and it works flawlessly for almost every WordPress user.
How to Use “Post Revision” to undo changes in WordPress
To undo changes in WordPress with Post Revisions, please follow the steps written below:
- When writing a WordPress post on the post edit screen, you may have observed that there is a Metabox, tagged “Revision” under the ‘Document’ menu, which shows how many revisions have occurred on that page.
Note: This option will only appear, after you have at least two different versions of the post, i.e. if you haven’t modified the post before, you won’t see revisions button. - You can find ‘Revisions’ on the right side of the post editor screen. Click on it to go to Post Revisions screen, here you will see the latest revision of the post with a scroll bar at the top, through which you can slide to move between other revisions. Each time you move the slider, you’ll see:
- A version of the previous revision, on the Left side.
- A version of the selected revision, on the Right side.
- Changes made to each revision will be shown there. The added content is highlighted in “Green” and the deleted content is highlighted in “Red”. The name of the user who made those changes will appear at the top of the page along with other information such as editing time.
- WordPress will also show if an edit is a manually created draft or saved via Auto-save.
- Use the ‘next’ and ‘previous’ buttons to move around revisions and make changes according to your need. So this is how you can UNDO changes in WordPress with Post Revisions.
Comparing Different Revisions:
You can compare two versions of your post. However, they are sequential revisions, meaning that one happened after the other.
- If you want to compare two different drafts (non-sequential versions) of the same post, click on the box at the top that says ‘Compare any two revisions’ which will split the scroll bar button in two and you can use the slider to move each button to different revision and compare the revisions.
- If you want to restore a revision, you only need to click on ‘Restore this revision’ or ‘Restore this auto-save’ button. When doing so, WordPress will restore that version of the revision as your current post or page revision. Also restoring to an earlier version will not remove any of your latest versions from WordPress. As an alternative all revisions will be saved in the WordPress database as another revision.
Customizing WordPress Revisions:
Revision is a default feature in WordPress that has built-in settings. Luckily, you can modify the tool if you want, including deleting, limiting, and disabling it.
Deleting Post Revisions in WordPress
If your WordPress website has thousands of revisions and takes up tons of database storage, you can easily do the cleaning by yourself.
You can remove old post revisions, if you no longer need them in future. To do this, grab a plugin called WP-Sweep. This simple tool will manage your revisions without any concern.
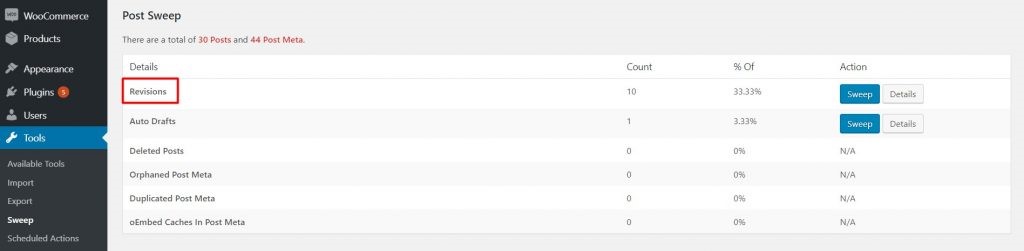
1. After installing the plugin, click “Tools” on your dashboard and select “Sweep”. In the table, you will see the revision.
Note: Maximum 500 revisions will be displayed for performance reasons.
2. Confirm what you want to delete and then click “Sweep”. There will be a dialog box displaying the number of revisions are being processed. Once complete, the revisions will be successfully removed.
Limiting Post Revisions in WordPress
WordPress gives you the power to decide and choose how many revisions you want to keep for an article or blog. If you want to limit your revisions, you can simply add the below code into your website’s wp-config.php file.
define ( ‘WP_POST_REVISIONS’, 10 );
You can change the number ‘10’ with the number of articles you want to keep for each post.
There is also a plugin named WP-Disable that will help to limit post revisions in WordPress. However, on the WordPress dashboard, the menu is labeled as “optimisation.io”.
- Ensure that the plugin has been installed. Click on Optimization.io and go to Admin tab.
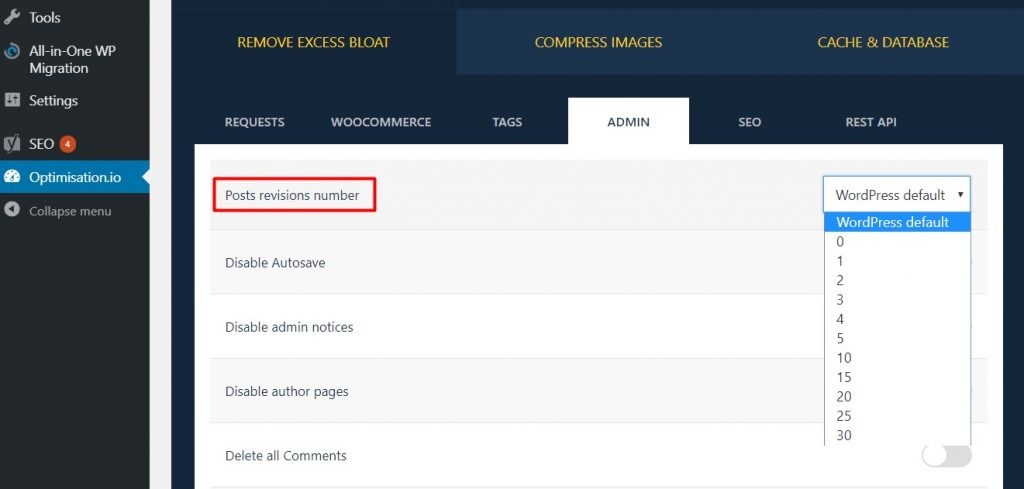
- You can see Post revision number settings on the top. Now open the dropdown menu and choose the maximum number of revisions you want. The maximum is 30.
How to Disable Revision in WordPress
You can disable WordPress revisions in two ways: first is optimisation.io or by modifying the wp-config.php file.
With the help of a plugin, you can easily change the Post revision number to 0.
Whereas doing it manually, i.e. editing the wp-config.php file can be unsafe, so follow the details mentioned below.
Firstly, make a new WordPress backup of your site as it helps you restore website if something goes wrong.
Generally, the file can be found in the public_html folder of your website.
To access the file, you need an FTP client such as FileZilla. Otherwise, you can also use the Hostinger File Manager. Once you locate the wp-config.php file, open it with a text editor and type the following line at the bottom of the file:

As soon as the file is saved, the changes must take place, disabling WordPress revisions.
Revisions Autosave interval can be managed by define WP_POST_REVISIONS in your wp-config.php file. You can choose to save the revisions every 30 seconds, every 2 minutes, or whatever you want. You can also turn it off completely.
Myth about Revision:
Turning off revisions will improve your site’s performance, which is definitely “not true.”
Recommended Posts


Top 12 PHP Libraries to Accelerate Web App Development
August 24, 2021